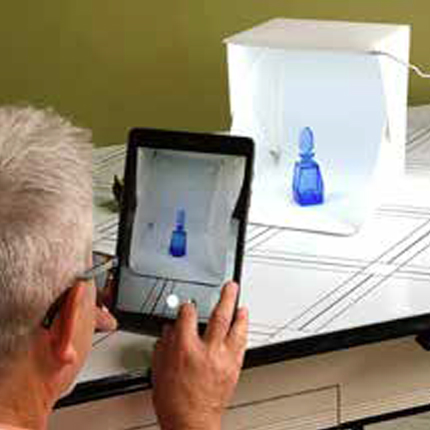
A FEW SET-UP BASICS:
ISOLATE THE PRODUCT. The camera sees everything — so eliminate ALL background “clutter and confusion” by isolating the item on a plain, lint and dirt-free, pattern-free, seamless white or black background (depending on the object’s color). This allows the camera to focus only on the object of your camera’s eye (and your heart’s desire).
LEAVE ROOM TO CROP. Close-ups can be challenging, so start by NOT standing so close! Work more to create a high-quality overall image than stressing over the close-up detail. A good quality photo will allow the object to be enlarged to see the detail. DO NOT ZOOM IN!
A FEW LIGHTING BASICS:
CHOOSE AN AREA OPPOSITE FROM THE SUNLIGHT, such as windows with natural – but not direct – sunlight. This eliminates harsher shadows and extreme reflection that bright, direct sunlight causes. TURN OUT ALL IN-HOME LIGHTS to avoid contrary lighting colors from incandescent, LED, and/or other artificial lighting. Choose a day with good natural lighting (away from direct or strong sunlight).
EXPERIMENT WITH LIGHTING OPTIONS to see how the camera responds. Some items may photograph better with more or less light, letting the camera do the work; even a background change can change how items appear in the final image. Glass bottles and shiny objects (like most compacts) are very responsive to light direction and reflection. Pay attention to highlights, washed-out hot spots, and reflections as much as dark areas that seem to completely disappear or shadows that obsure edges or defining features.
PERFUME BOTTLE PHOTOGRAPHY IS NOT A NEW TOPIC for this audience or this publication, but no doubt it remains a curiosity — or a curse of frustration — when trying to capture all the beauty of a bottle or vanity item. Truth is: pretty bottles and delightful vanity items can be challenging to photograph for high quality and giving justice to all those gorgeous details. With the advent of high performance cameras built into smart phones as well as the evolution of standard camera equipment and options, here are a few more pointers for both the experienced and amateur — but oh-so passionate! — bottle and vanity item collector who wants to immortalize their treasures. (And hopefully share them with fellow PBQ readers!)
A FEW IDEAS and OPTIONS:
INVEST IN A PHOTO LIGHT BOX. Short of hiring a professional photographer (and depending on the size of the items), a collapsible photo light box may help capture ideal images. Amazon, B&H Photo, and other online retailers sell various sizes from roughly $30 to $100 – plus, depending on size and additional features. The benefit is having a light-controlled area designed to showcase items without distraction or distortion. Some come with alternate backgrounds, top-view window, stationary or rotating stands (great for video!), or lighting options. NOTE: Low lighting often yields grainy, fuzzy images — take test shots, enlarge the image to view its clarity, then adjust if necessary.
DO A LITTLE RESEARCH. There are many online How-To articles and videos about “macro photography” — taking photos of very tiny things —and egular photography with a professional camera or smart phone. If using a smart phone, check the phone’s Camera Settings to ensure it is set for the highest quality results — or better yet, ask for assistance when setting an existing phone or selecting a new one.
FOCUS, PRACTICE, and BE PATIENT. Like anything else, practice and patience win the prize. But oh what a prize it is when a beautiful photo helps share a beautiful bottle’s or vanity item’s story!
Source: “Bottle Immortality: Tips & Tricks to Create Better Bottle and Vanity Item Photos” by Don Orban, PBQ Fall 2019.
